Tuesday, November 10, 2009

What to do when the light is flashing

I've had people ask me before what they should do if the Ready Light on their SMART Board is flashing. First of all, the Ready Light is the small LED light at the bottom right side of the board. When the light is solid green your board is functioning properly. There are several reasons your light may not be solid green.

No light: Your board is not connected properly/ Your computer is not turned on.

Flashing green light: Your SMART Software is not working properly. If this is the fist time you've attempted to use your board with the software check to make sure you installed the software and the drivers and that you have entered the product key correctly. If you had previously used the board and software you may need to uninstall and reinstall the SMART software.

Solid red light: The board and computer are not communicating properly. Try restarting your computer. If that does not solve the problem try resetting the board. How do you do that, you ask? Look at the lower right side of your board. You will see a small gray box with a reset button. Use a pen to press the button and hold it for a couple of second.

Flashing red or amber light: SMART calls this a "problem state". Reset your board (see above).

Hopefully these quick troubleshooting tips will help the next time to come across one of these problems.

Thursday, October 29, 2009

Creating a Simple Page

This video demonstrates how to create a very simple Notebook page. You could have several pages similar to this in one document.

Wednesday, October 28, 2009

Using the Pen Tray
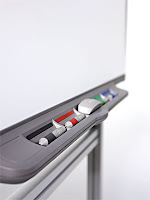


The pen tray is located on the front of your SMART Board. You have a black, red, green, and blue pen, one eraser, and two buttons. In an earlier post we discussed that you can press the two buttons together to get the Orient screen. By themselves, the buttons will perform a right-click, or bring up the onscreen keyboard. For the pens and eraser, all you have to do is pick up one of these objects to use it. A light will come on in its place and the tool is ready to use. You can be using any computer application. For example the pens and eraser can be used while on the Internet, a Word document, PowerPoint, or SMART Notebook.

You can easily customize these objects by clicking the SMART icon in your desktop pen tray and choosing "Control Panel". From the Control Panel you choose "SMART Hardware Settings" and then the pens and buttons option. I like to change my green pen to a highlighter so that I have one easily accessible whenever I need it. This is easy to do by simple choosing the green pen and changing the transparency. The buttons can be customized as well to perform functions such as print screen or open Notebook.

Friday, August 28, 2009

New School Year

It has been a whirlwind of activity around here the last few weeks. School started for us right after my last post. Things are starting to settle down and become routine now. I will try to do much better at updating this blog to keep you informed on all things SMART.
For those of you who are also starting the new school year, what are you doing with your SMART Board?

Friday, July 31, 2009

Miller Perry

Thank you to all the teachers at Miller Perry Elementary. I enjoyed conducting your training today and hope that you took away some things that you can use in your classroom. Enjoy your new SMART Boards!

Thursday, July 30, 2009

Orienting the SMARTBoard
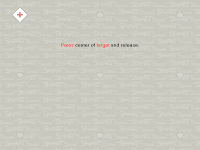

Now that you have the green light to go ahead and use your SMARTBoard you need to orient the board. This process calibrates the board so that when you touch the board the computer knows where you are touching.

There are a few different ways to get the Orient screen to come up. You can click on the Notebook icon in the taskbar of your computer. A menu will appear and you can choose "Orient". You can open the Control Panel from the same place and select "Orient" from there. I find the easiest way to get the Orient screen is by pressing the two buttons on the pen tray. You will notice there is a button for the mouse and a button for the keyboard. If you press these two buttons at the same time the Orient screen will appear.

Once the Orient screen is up you simply need to press the center of each plus sign as they move about the screen. You can use your finger or a pen to do this. If you make a mistake you can go back by pressing the previous plus sign. Once you have completed them all your board is oriented and ready to go.

Many people ask how often they should orient. The answer is simple: you'll be able to tell when your board needs to be oriented. When you have to touch to the side of something instead of directly on it to select it then it is time to orient. With a wall-mounted SMARTBoard you shouldn't have to orient too often. However, if your projector shakes when the door slams or the A/C turns on, you'll most likely need to do it more often. I would recommend orienting each morning before you begin your day.

Wednesday, July 29, 2009

Getting Connected
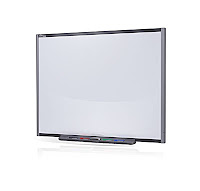

So...you walk into your classroom and there is a large white board on your wall. You knew it was coming, but now that it's here, what do you do with it? For starters, make sure the board is connected to your computer and the computer is connected to the projector. When your computer and projector are turned on you should see a solid green light on the bottom right corner of the SMART Board. Now you're ready to go!
If the light is solid red make sure everything is connected or try unplugging and plugging the USB cord in the computer. If the light is flashing red or green try restarting your computer.


Beginning to Blog

This is the first entry of The SMARTer Classroom Blog. It is my hope that this will be a place for teachers, librarians, and anyone using SMART Boards in education to come for information and tips. It is also my hope that readers will share their own thoughts and ideas on using SMART Boards in the classroom, the SMARTer Classroom, that is.